


สวัสดีครับ จะมาแนะนำการใช้ ChatGPT เพื่อเขียนเนื้อหาบน Google Docs เป็นวิธีที่สะดวกและมีประสิทธิภาพมากครับ สำหรับการสร้างเอกสารที่มีคุณภาพและมีเนื้อหาที่หลากหลาย ต่อไปนี้คือขั้นตอนและเคล็ดลับที่สามารถช่วยให้คุณใช้ ChatGPT ในการเขียนเนื้อหาบน Google Docs ได้อย่างมีประสิทธิภาพ ก่อนอื่นเลย เพื่อน ๆ ต้องไปขอ API KEY ChatGPT ได้ที่นี่ครับ คลิก
ตัวอย่างบทความที่ใช้ ChatGPT เขียน

ขั้นตอนการใช้ ChatGPT เขียนเนื้อหาบน Google Docs อันดับแรกให้เพื่อน ๆ เปิด Google Doc และเปิด App Script ได้เลยครับ ลบข้อมูลใน Google App Script ให้หมด จากนั้นให้คัดลอกโค้ดด้านล่างลงไป อย่าลืมนำ API KEY ChatGPT ที่ได้มาใส่ด้วยนะครับ
function onOpen() {
DocumentApp.getUi().createMenu("Auto Blog")
.addItem("Generate Blog", "myFunction")
.addToUi();
}
function myFunction() {
var doc = DocumentApp.getActiveDocument()
var selectedText = doc.getSelection().getRangeElements()[0].getElement().asText().getText()
var body = doc.getBody()
const BASE_URL = "https://api.openai.com/v1/chat/completions";
// Replace YOUR_API_KEY with your actual OpenAI API key
var apiKey = "xxxxx";
var prompt = "Generate a detailed full length article about " + selectedText;
const headers = {
"Content-Type": "application/json",
"Authorization": `Bearer ${apiKey}`
};
const options = {
headers,
method: "GET",
muteHttpExceptions: true,
payload: JSON.stringify({
"model": "gpt-4-0613",
"messages": [{
"role": "system",
"content": ""
},
{
"role": "user",
"content": prompt
}
],
"temperature": 0.5
})
}
const response = JSON.parse(UrlFetchApp.fetch(BASE_URL, options));
console.log(response.choices[0].message.content);
para = body.appendParagraph(response.choices[0].message.content)
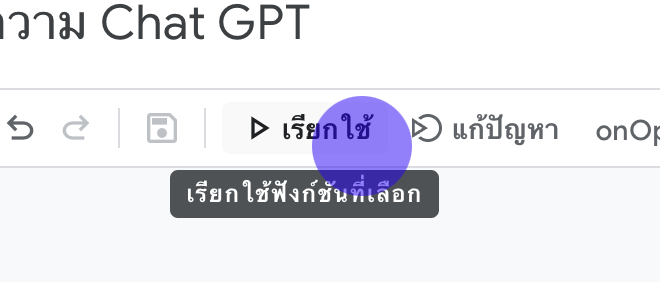
}จากนั้นให้กดปุ่ม เรียกใช้ (Run) ดังภาพ
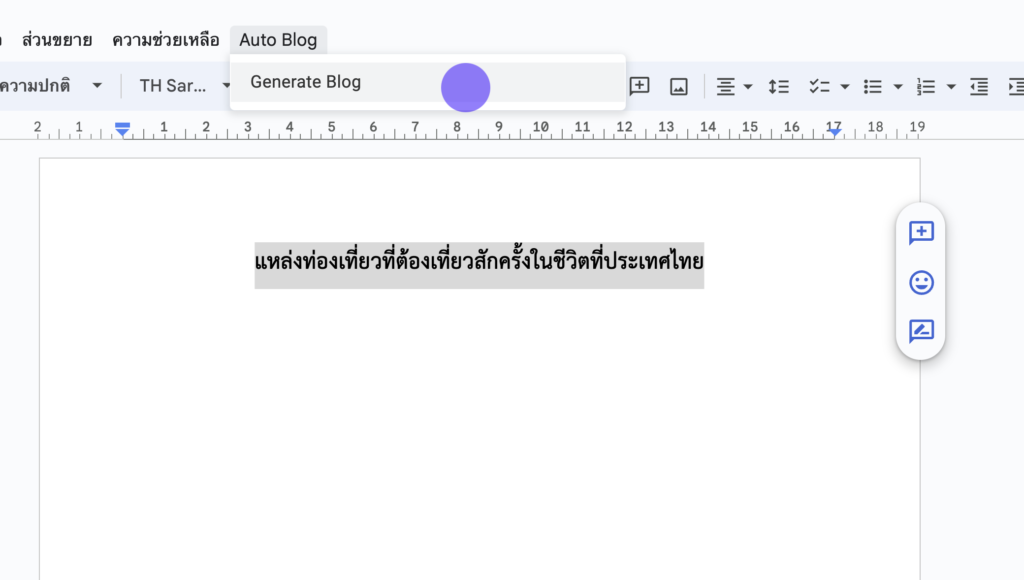
เมื่อกดปุ่มเรียกใช้ เรียบร้อยแล้วให้กลับมาหน้า Google Doc จากนั้นให้เพื่อน ๆ เขียน Prompt เนื้อหาบทความได้เลยครับ จากนั้นเพื่อน ๆ ทำไฮไลท์บทความ และไปเลือก เมนู Auto Blog และ Generate Blog ก็จะขึ้นมาให้เพื่อน ๆ คลิกที่ข้อความ Generate Blog ได้เลยครับ ดังรูปด้านล่าง
ผลลัพธ์ที่ได้ก็จะเป็นดังรูป

ที่มา: https://github.com/MAN1986/LearningOrbis/blob/master/openAiIntegeration.gs

